This article will guide you through setting up SendGrid as your SMTP Email Delivery Service, for your CRM.
There are many good reasons for using an SMTP email delivery service (as opposed to using your web hosting server). The most significant is email deliverability. You are more likely to get your email to land in the inbox, as opposed to the spam folder, when using a reputable email delivery service like SendGrid, Mailgun, Mailchimp, etc
First things first, you will need to signup for a free account with SendGrid
Create a (Sender Identity)
In this step, you will set up the email address that will be used for sending emails by the CRM. This is the email address that your recipients will see as the from email address.
As soon as you log into your SendGrid account, you will see the following section on the dashboard/home page.
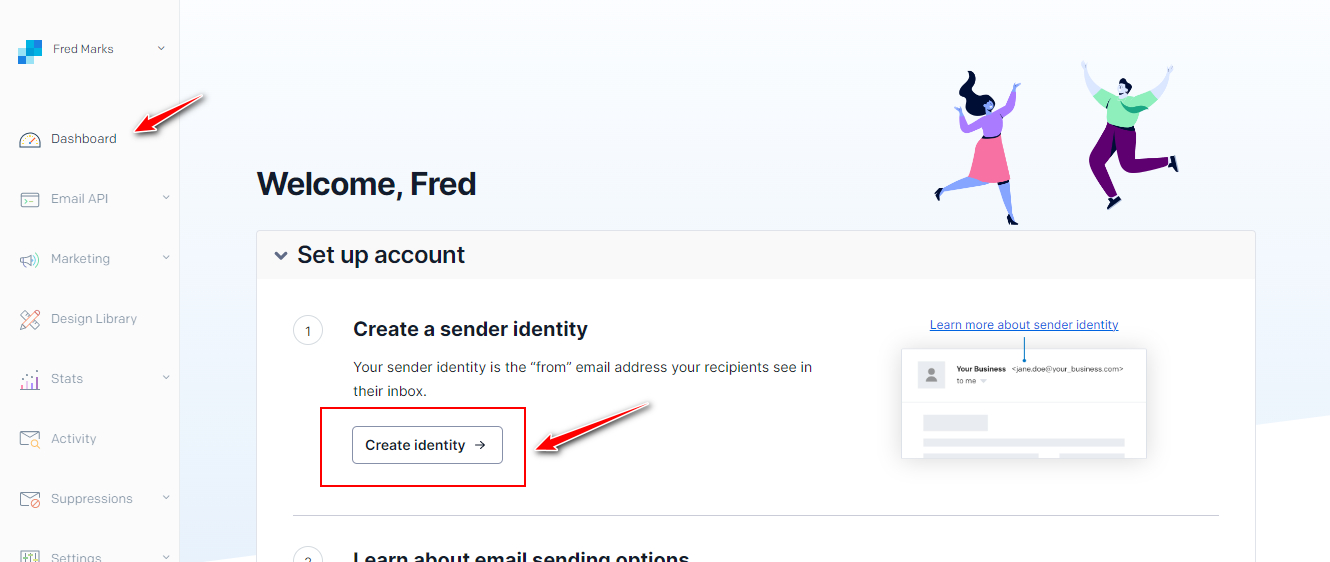
Click the Create Identity button.
This will bring you to the screen shown below.
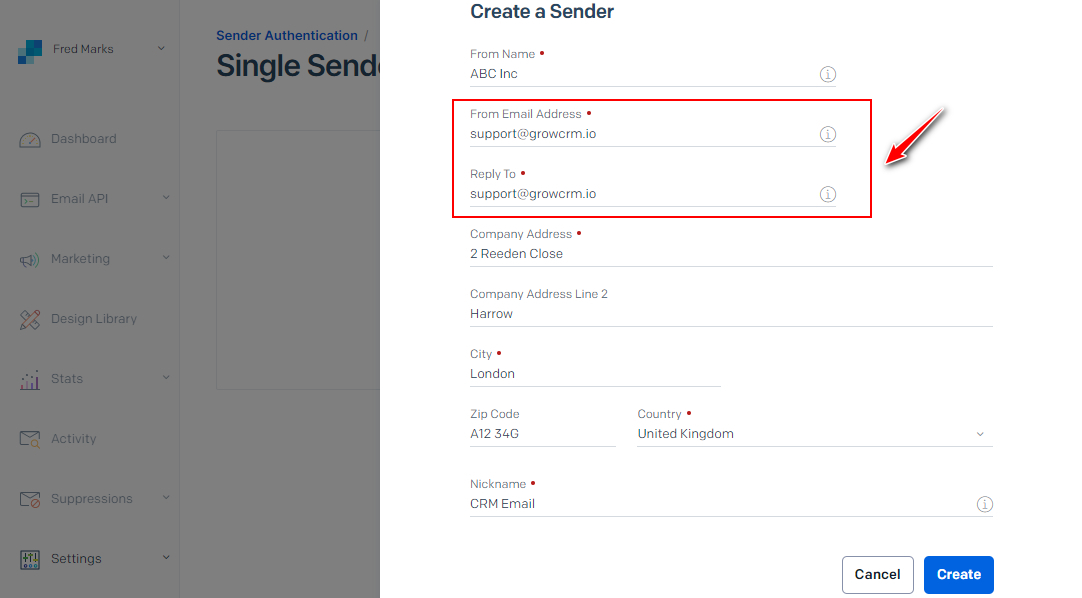
Fill in the form, making sure that the email address section (highlighted above) is filled in with your business email address (e.g. something@yourdomain.com).
SendGrid will send you a verification link to this email address, to make sure that you are the owner of it.
Verifying your email address
Now go and check your email (the address you provided in the step above). You should have 2 emails from SendGrid. Below is an example of these emails.

You must click the verification buttons inside each of these 2 emails
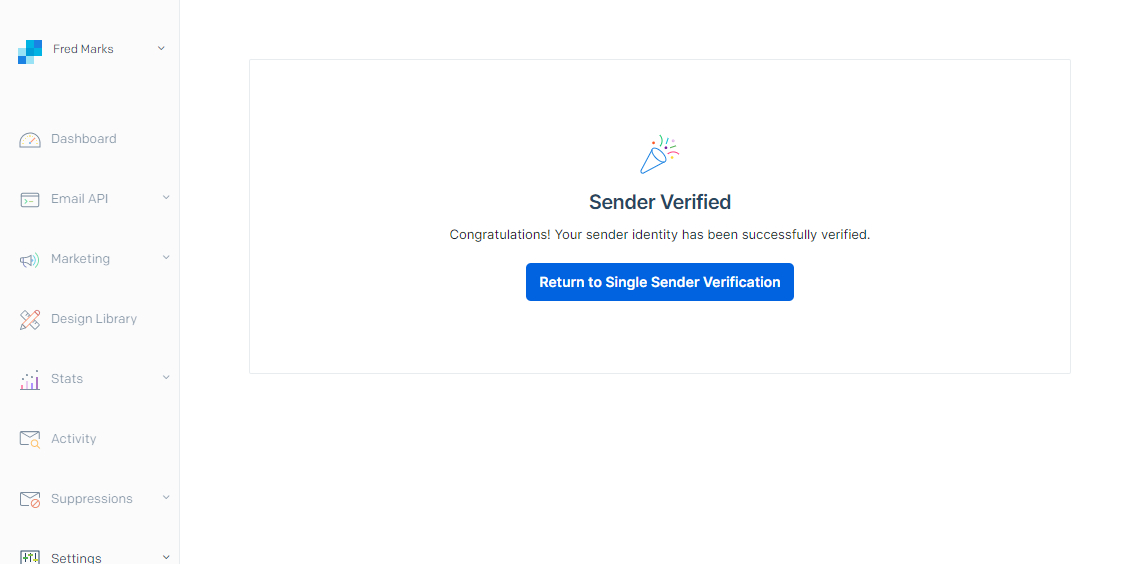
Once done, you will see a confirmation in SendGrid that your email address has been verified
You can also double-check that your email address has been verified as shown below
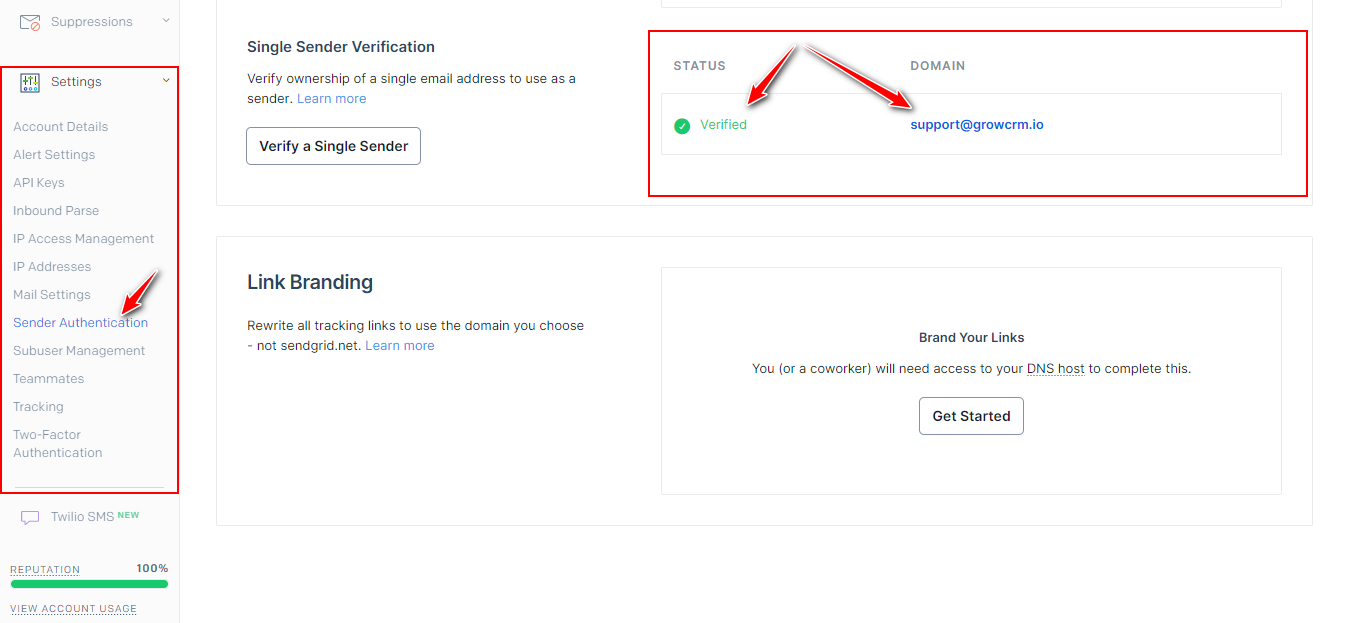
It is very important that you verify your sending email address (as shown above). You will not be able to send emails until you have done this
Create an API Key
Next, you will need to create an API key.
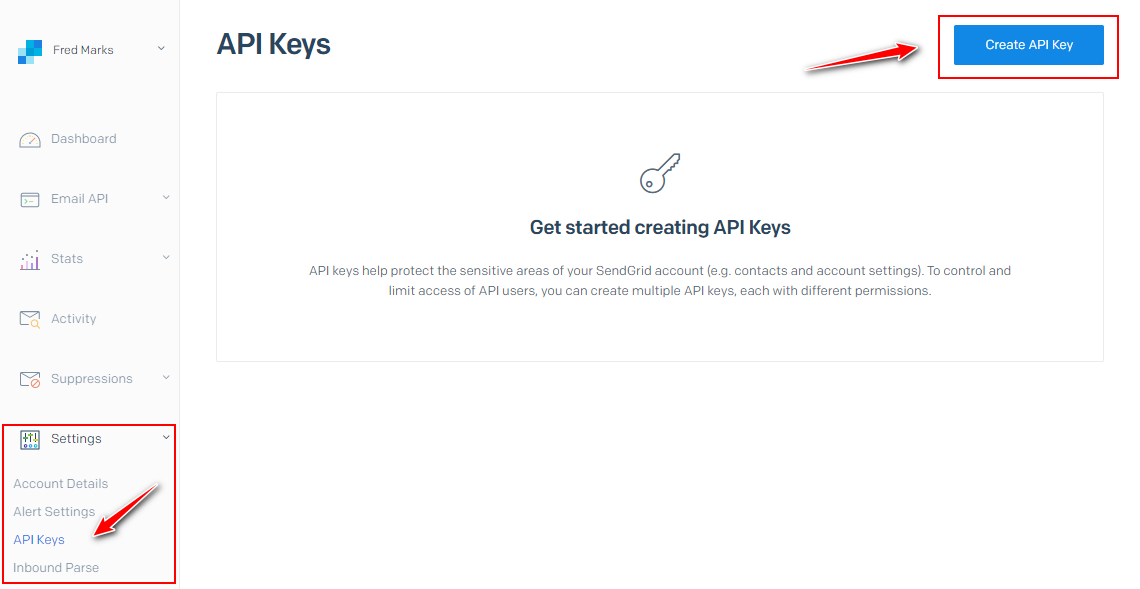
Click on the Create API Key button
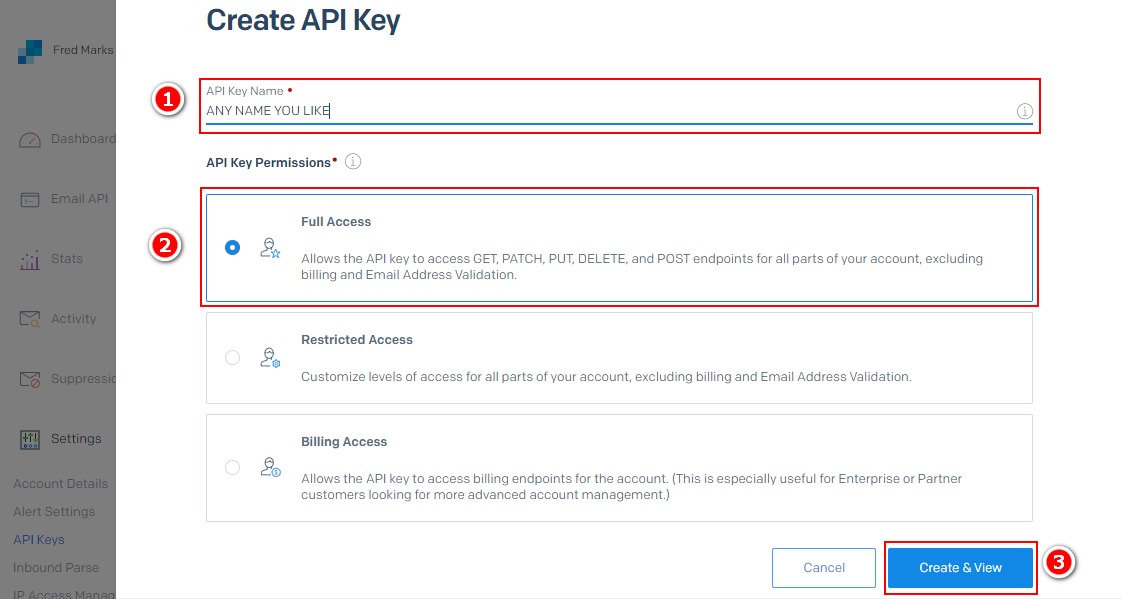
Once you have filled in the form as shown above, click Create & View
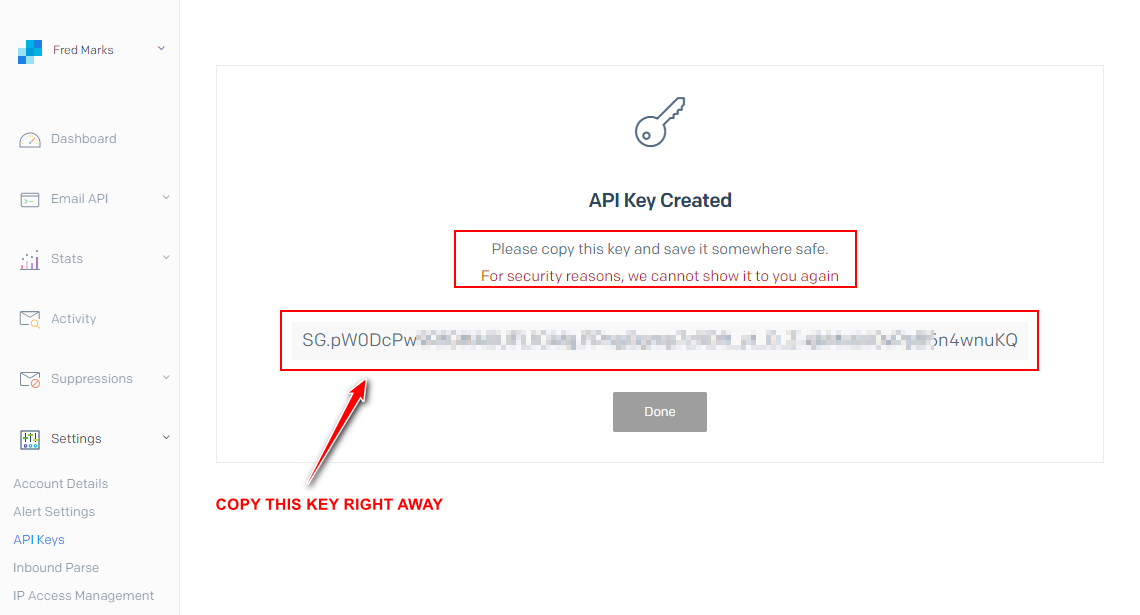
IMPORTANT!!
Copy and save your new API Key
The final steps will need to be done inside your CRM (settings section), as shown in the steps below
Configure Email Settings
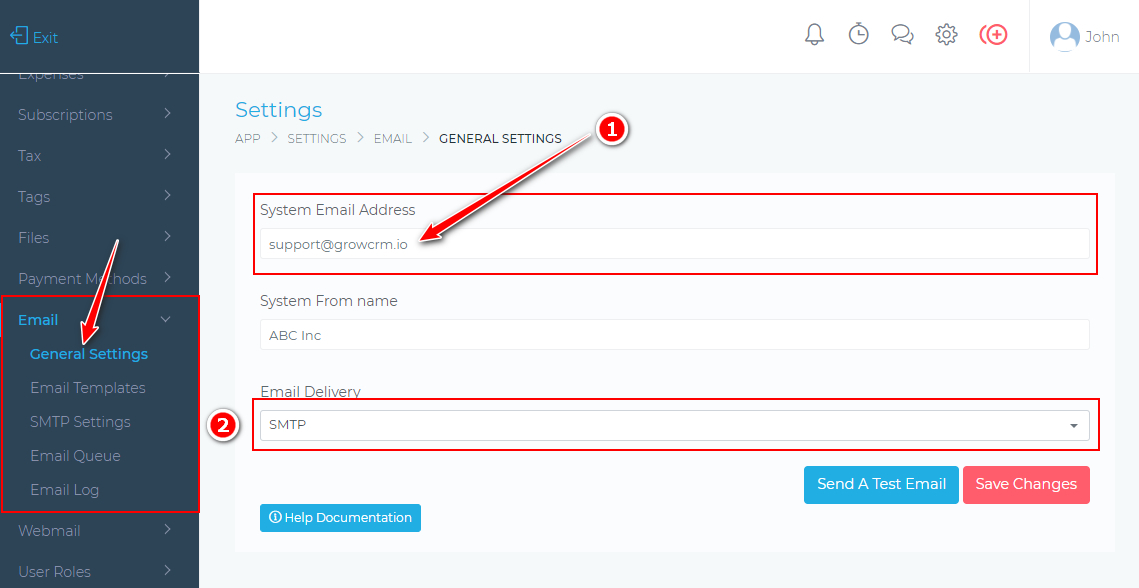
You will now need to configure email settings inside your CRM. Follow the steps shown below
1.System Email Address – You must enter the same email address that you verified in SendGrid
2.Email Delivery – SMTP
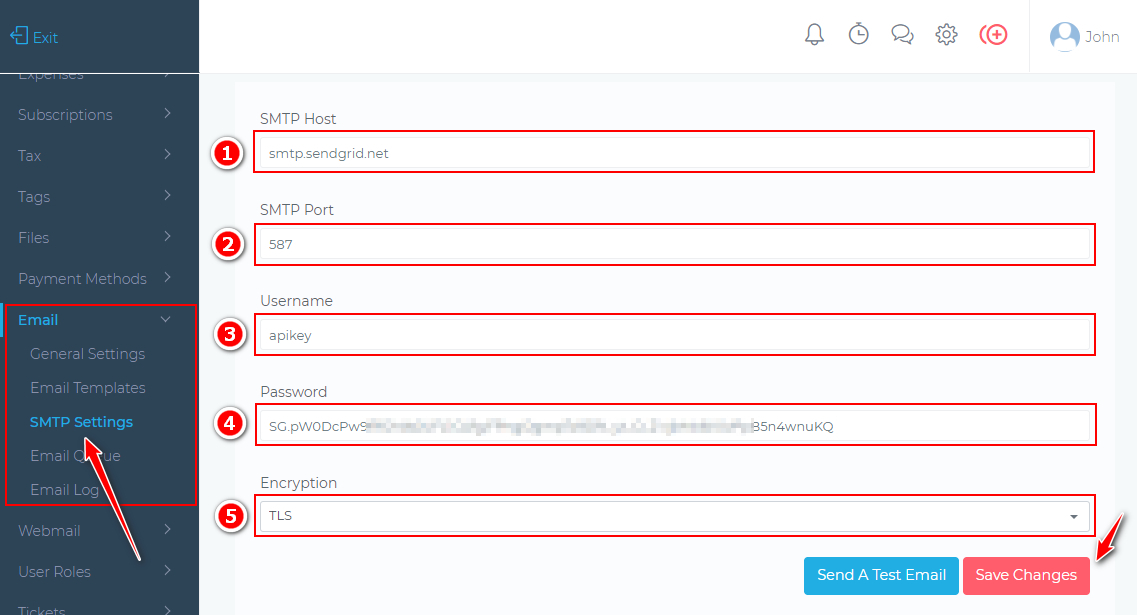
In the last step, you will enter the following information:
SMTP Host – smtp.sendgrid.net
SMTP Port – 587
Username – apikey
Password – (use your SendGrid API key that you created in the steps above)
Encryption – TLS
All Done!
All your emails from the CRM will now be delivered effeciently via SendGrid